SyNc SNARE Drum Patch Explained: Copy the SNARE part and open it in the SYNTH.Play a few keys and you will notice stuff you can’t hear in the Drum Sequencer. This patch consists of 2 parts: a SYNTH part and a FX Part.
- the main component is a noisy burst
- the notes sound like they are pitched; as you move up and down the keyboard the pitch seems to change. However, if you listen closely you will notice that it’s not actually the pitch changing, but the Tone Color changing. This is done with a Filter of some kind.
- the snare-sound is complex. The sound of the noise burst actually changes slightly over the note event. Listen carefully and you will hear a slight sweeping sound during the note. This is probably to mimic the snares moving around.
- if you hold the note down, you can hear some noisy stuff in the background; this is actually coming from the FX used in the patch
- there is a nice “thwack†sound at the transient edge of the note; really sounds like a drumstick hitting a taught drum-head
The Noise Burst comes from the VCO1 Noise Waveform.
The Tone Color is changing as you move up and down the keys – this must be the Key Followed MG affecting one or more filters.
A sweeping Tonal effect inside the note is from the MG with a really low frequency setting.
The Thwack and the background noise when the note is held are both from the Compressor effect.
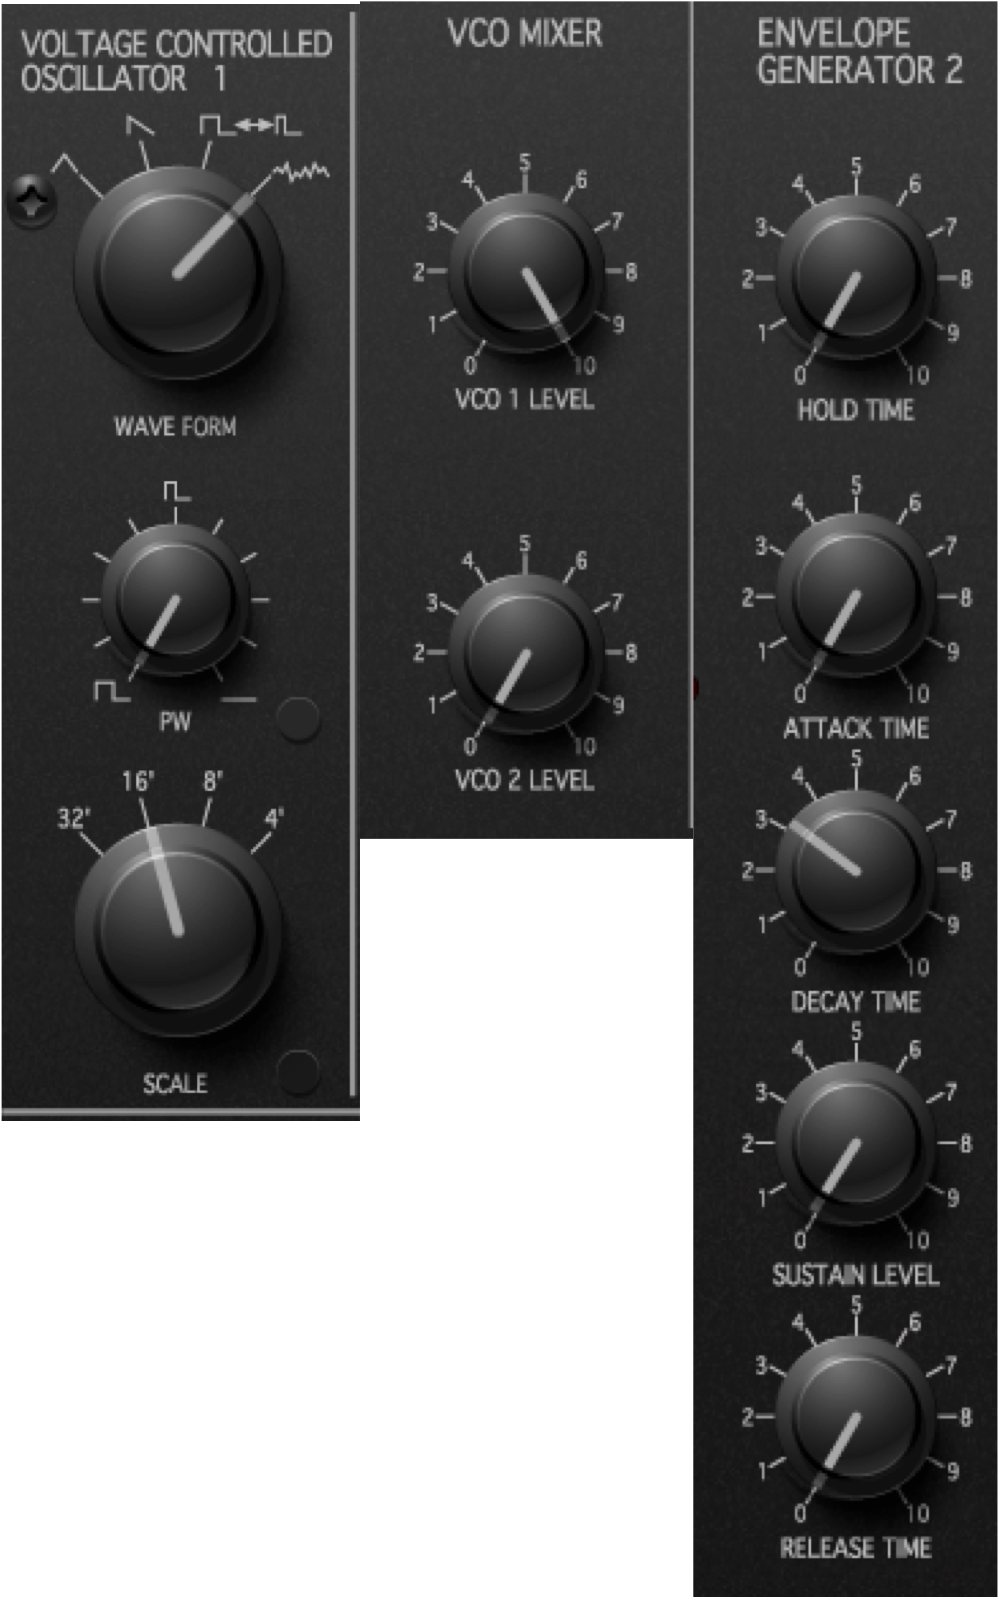 1. The Noise Burst:Â The Noise Burst is done with VCO1 on the Noise waveform. The Octave (Scale) does not have any effect because noise has no fundamental frequency or pitch.
VCO1 is mixed at full volume (10).
The duration of the burst is done with EG2 which controls the VCA. This is a transient so the sustain level is set to 0. The attack is also at 0 because we are looking for a tight sound. The Decay controls the duration of the burst. Play with the Attack and Decay controls to understand how they are working in the context of the patch sound.
Right now, we have a kind of boring sound – a burst of noise that has no internal motion and does not change with the key you depress.
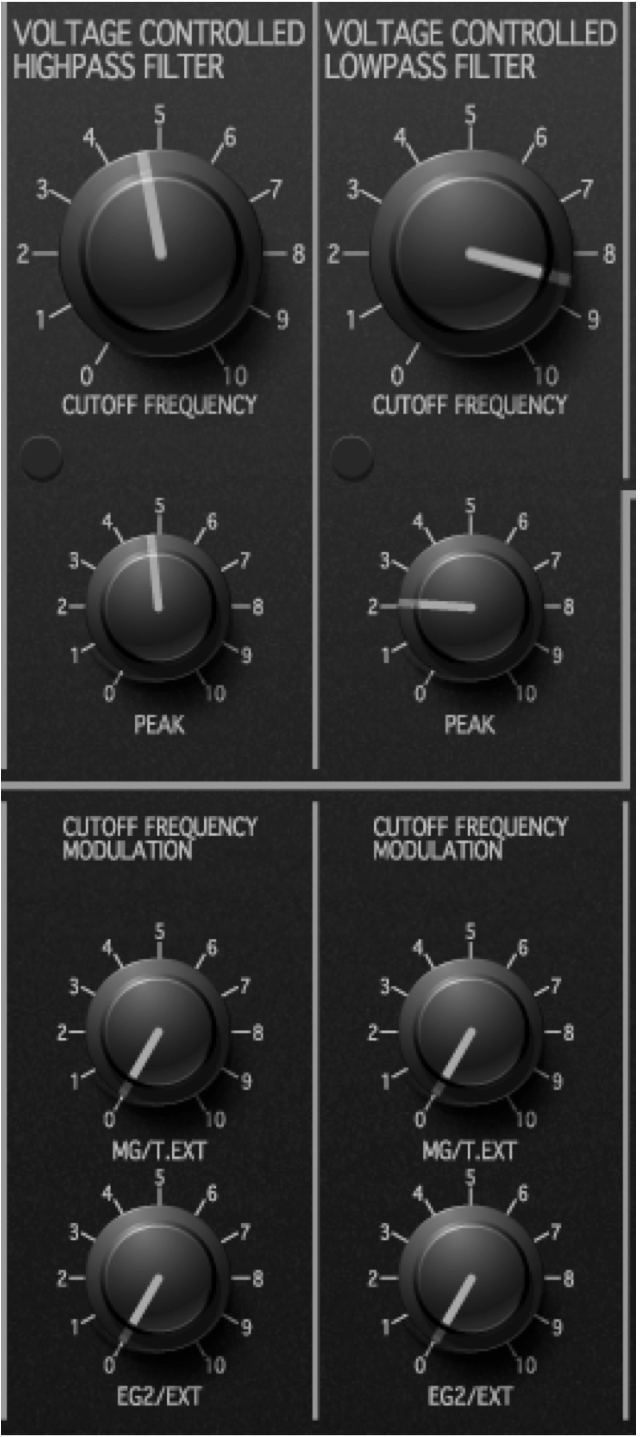 2. The Tone Color:Â Both the HPF and LPF are used to adjust the Tone Color of the Snare sound. You are making a Bandpass filter when you adjust them. Set the Filter Cutoffs and Peaks as shown, then adjust them. Note there is no modulation of the filters at this point. We are just playing with the raw Tone Color of the Noise Burst.
<- alter Tone Color here
<- no modulation (yet!)
 3. Key-Followed Tonal Changes: The Snare sound changes as you move up and down the keyboard. This is done in 2 parts:
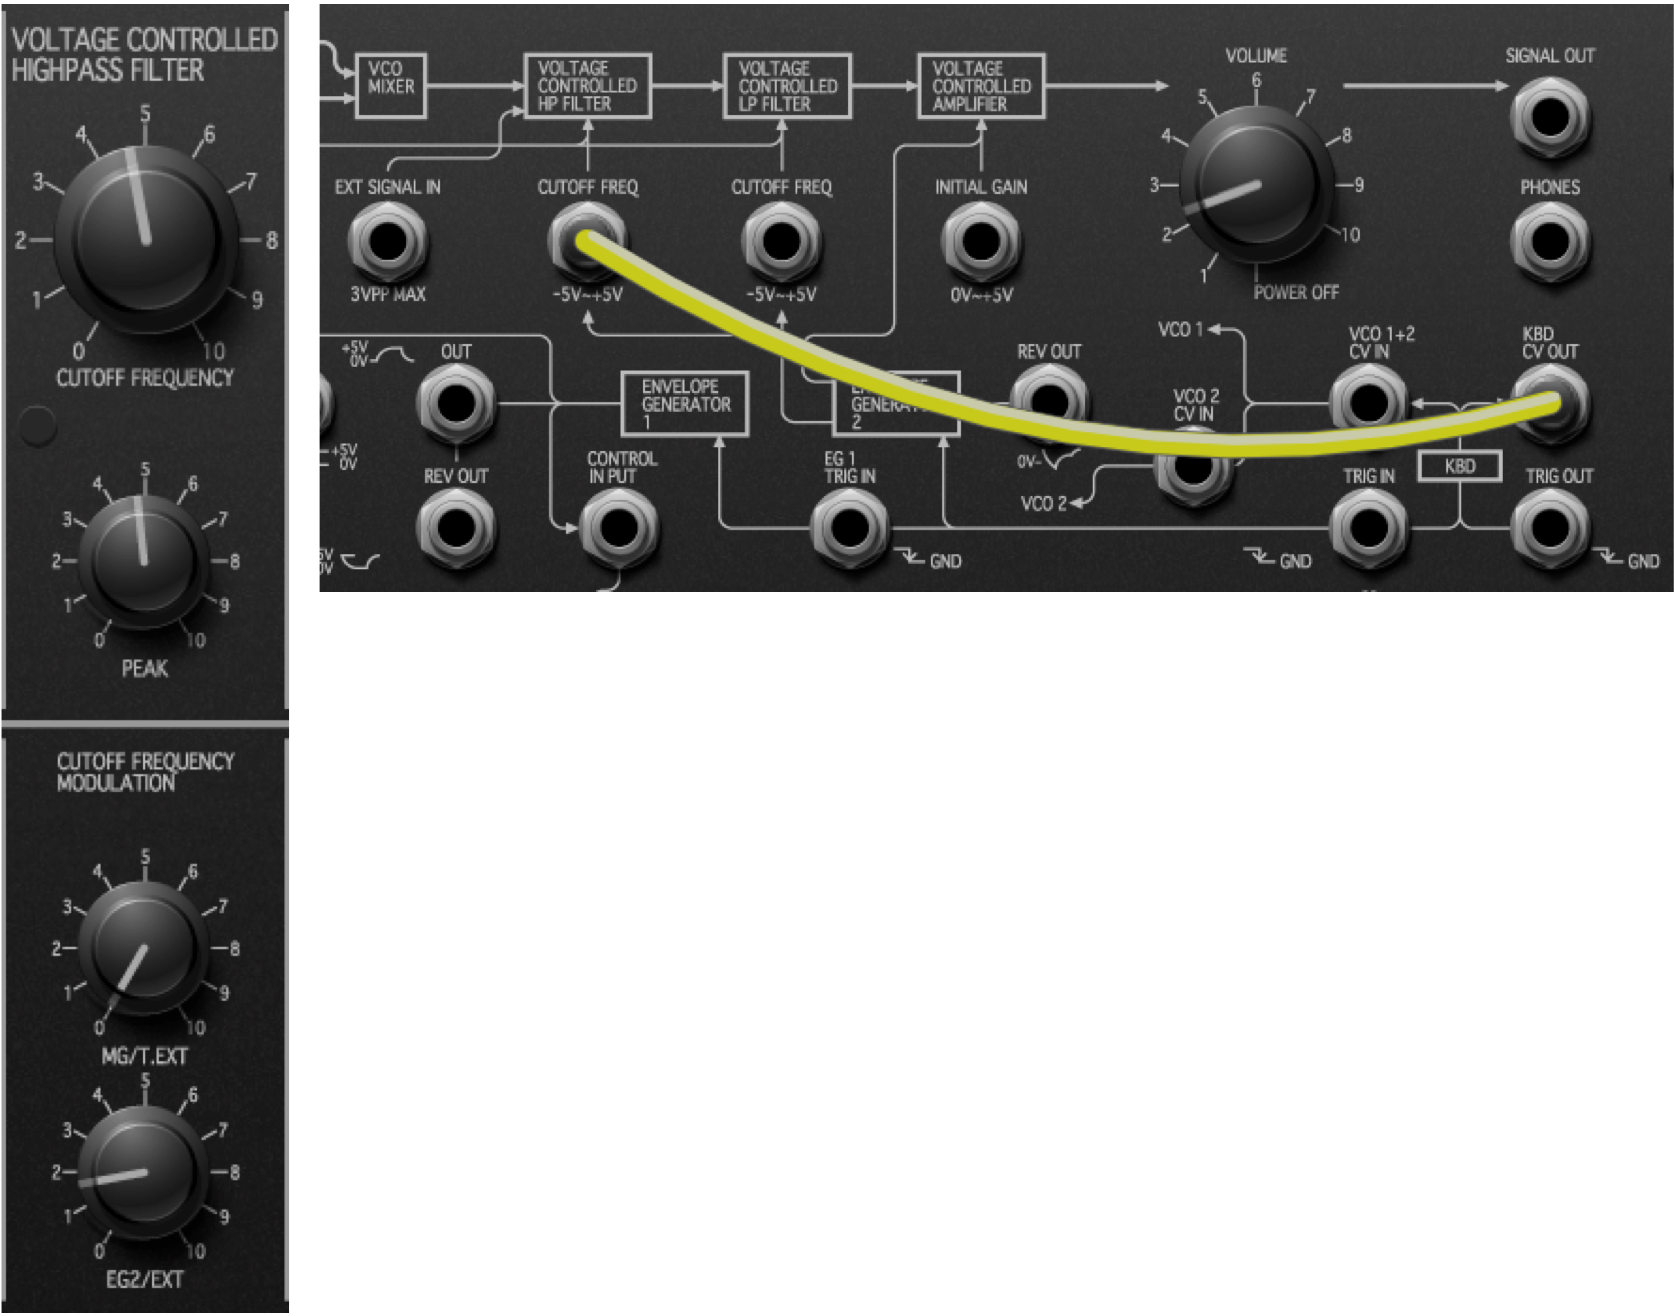
First, you need to manually patch the Keyboard’s CVOUT into the HPF’s CUTOFF FREQUENCY input. This disconnects EG2 from the HPF. As you play higher up the keyboard, the filter’s cutoff frequency gets higher too making the sound brighter. Lower keys give a darker sound.
Next, you vary the amount of change by using the MG/EXT Knob on the HPF. The more you increase MG/EXT, the higher the cutoff frequency will move, so for low, thick snares you want this knob to be at a low value. Try it.
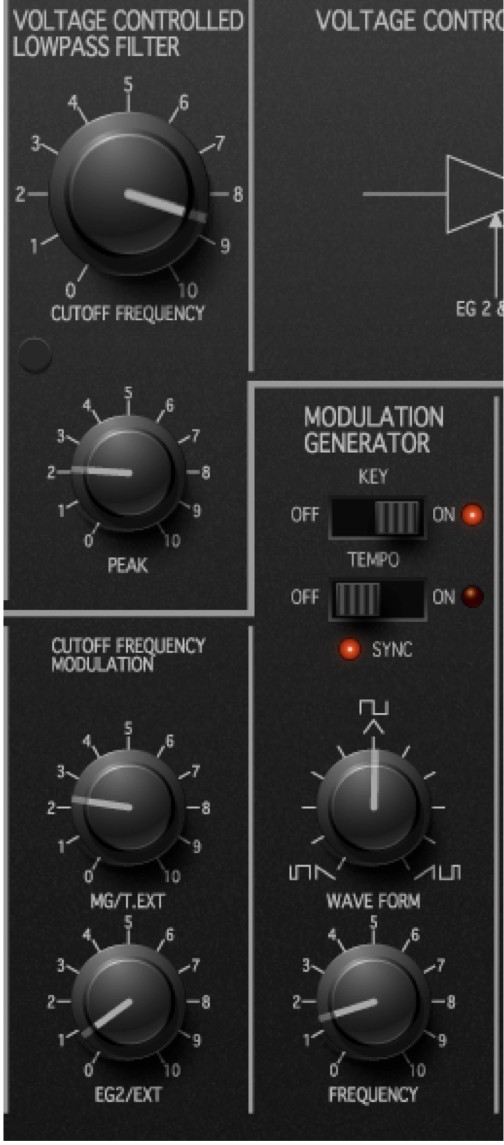 4. Tonal Complexity – motion of the Snares: The Note Event is complex; as the event progresses the tonal color opens up a bit. This is probably the most subtle, yet complex component of the patch. It is accomplished by modulating the LPF two different ways: With the MG on a triangle wave and the EG2’s already fixed Decay time.
To understand how this works, setup the MG and LPF Mod Sources as shown. Next, vary the Modulation Depth of the MG by turning up the MG/T.EXT knob; then vary the MG’s frequency. You will really hear the effect. Also, note that the MG is setup with Key Follow = ON so the frequency increases as you move up the keyboard. Think of the snares on the drum moving faster for a higher-pitched (tighter) drum head. After experimentation, reset to the Patch’s original and then re-audition the sound to hear the subtle tonal shifts.
You will notice that the effect of the EG2 is quite subtle and probably difficult to hear over the iPad’s speakers. It actually serves to soften the snare motion a bit. Adjusting EG2/EXT to the full value gives a slightly duller sound.
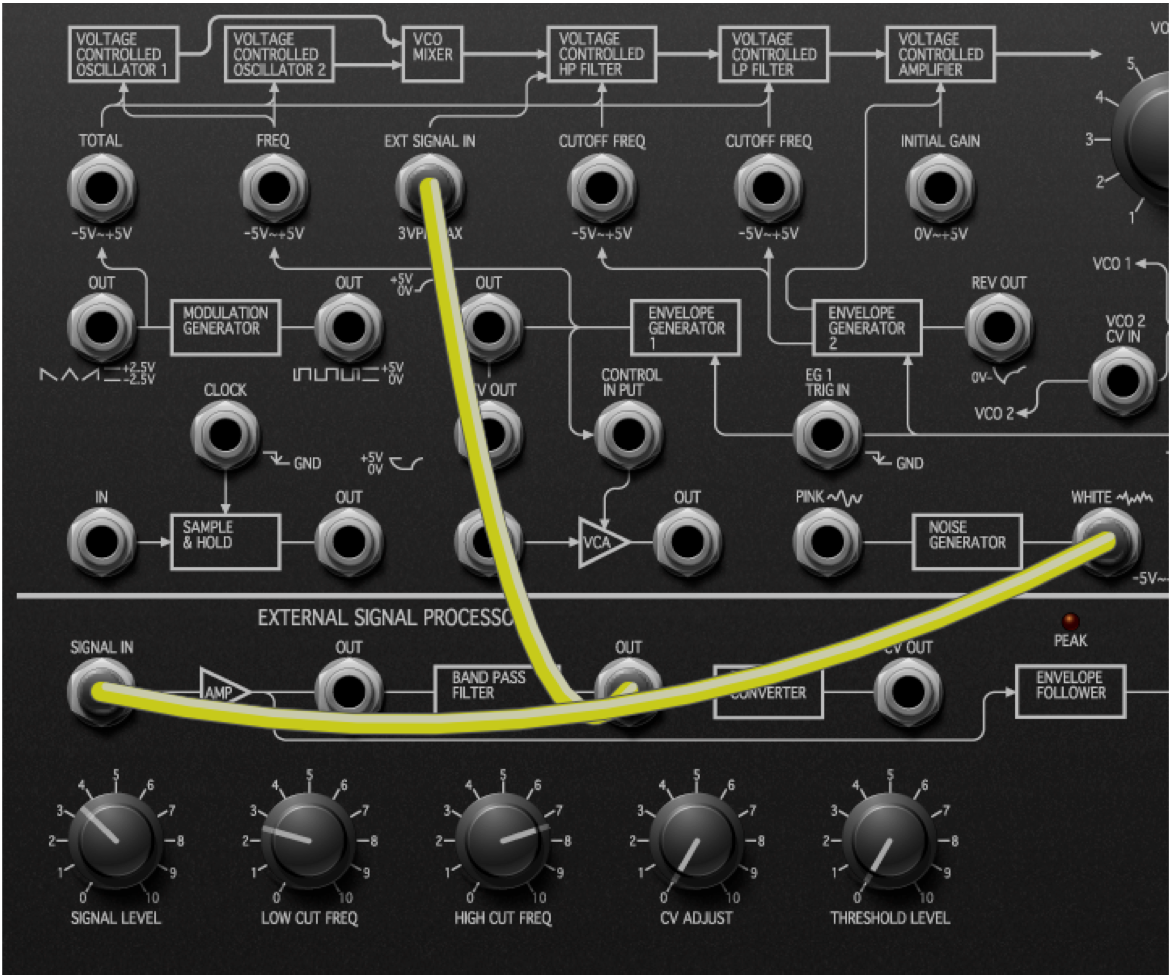
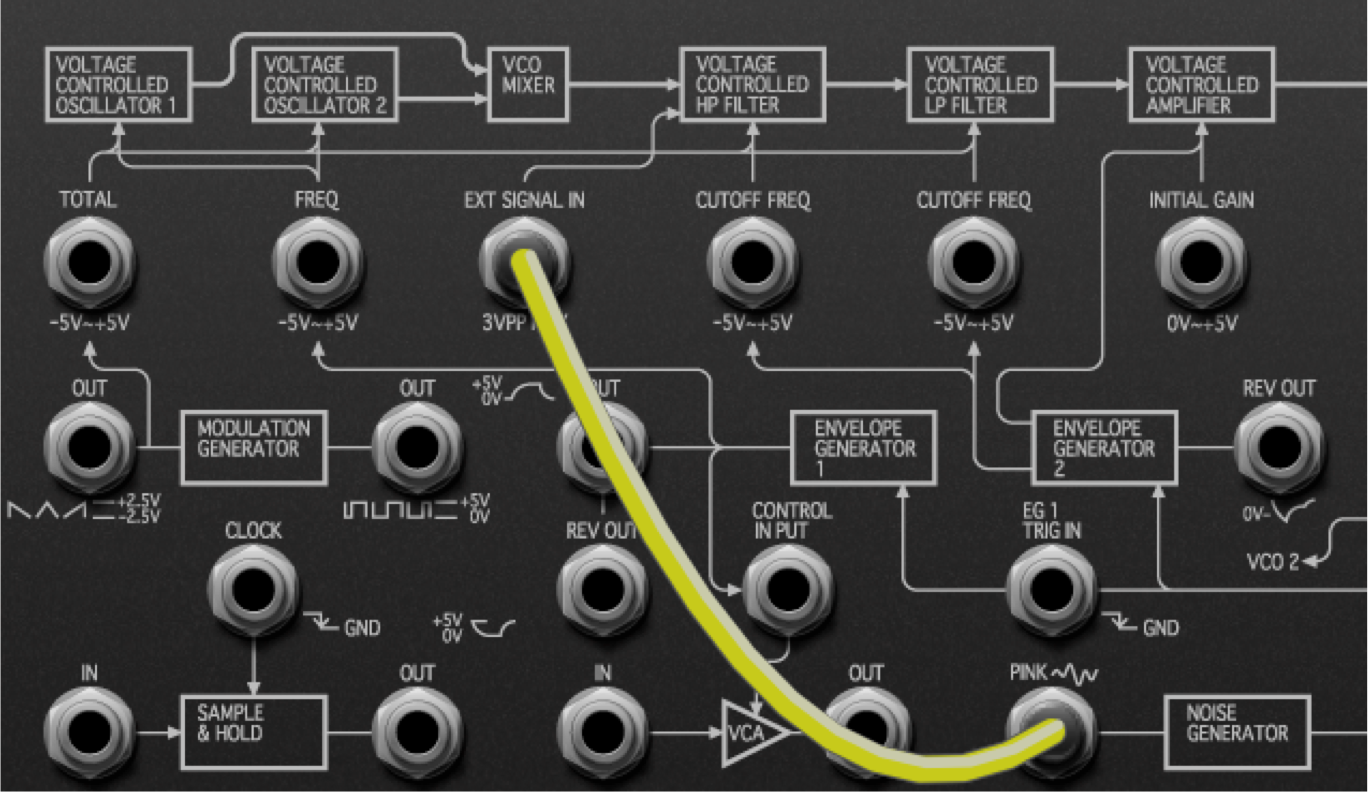 5. Additional Noise Component – thicker and darker sound: The patch features an additional noise component from the Noise Generator. You manually patch the Pink Noise output into the EXT SIGNAL IN jack to add another layer of sound. The VCO1’s noise is always white noise, so adding some pink noise will add more thickness. It will be controlled by the VCA so it tracks the original noise burst. You can experiment by changing the patch from Pink to White noise and back. Adding more White noise will make the snare brighter sounding. NOTE: the KYBD CVOUT to HPF CUTOFF patch is not shown for clarity.Â
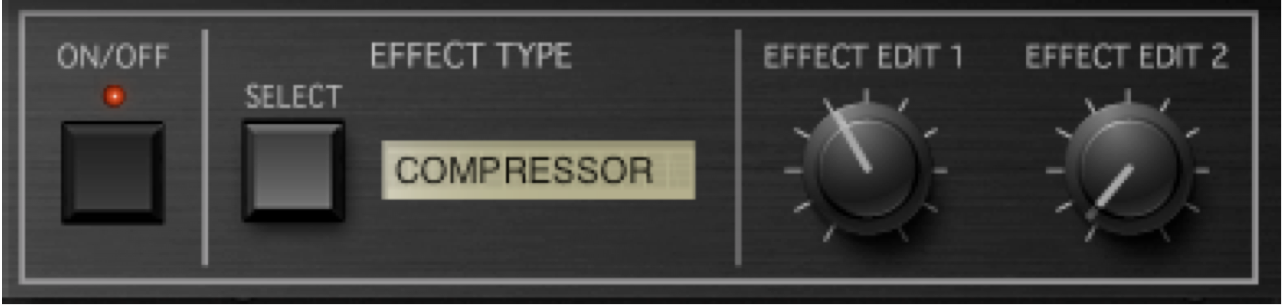 6. The THWACK Sound:Â The last component to add is the Thwack of the drumstick on the drum head. This is done with one of the Effects: the Compressor. Adjusting the Effect Edit 1 (Sensitivity or Threshold) will change the tightness of the drum. You will be impressed by how much this one FX changes the overall patch sound. The noisy stuff you hear in the background is due to the compressor; it is amplifying the system noise. It is not actually part of the synth patch itself!
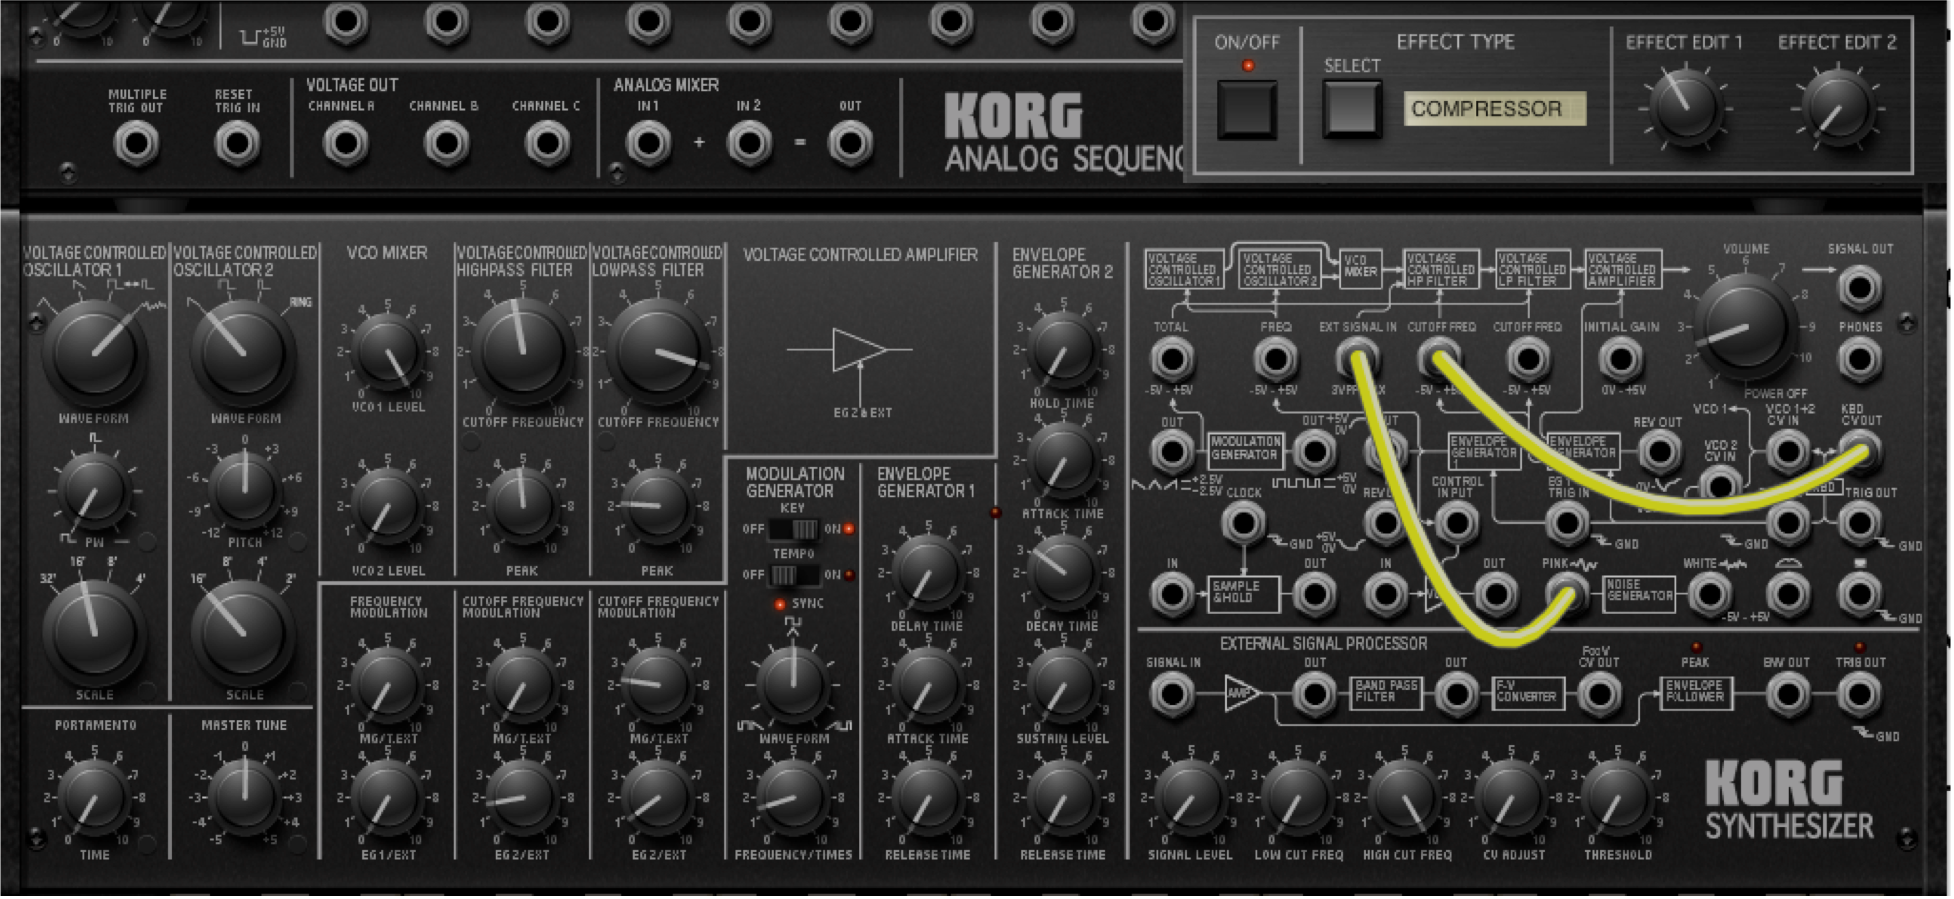
The Complete Snare Patch (click to enlarge)
Variation #1: Tonal Shaping of the 2nd Noise Component:Â You can take this patch and make many tonal variations on it by changing that second noise component (the manually patched Pink Noise into EXT SIGNAL IN). This is done with the External Signal Processor. First, un-patch the Pink Noise. Then, patch the White Noise into the input and patch the output after the BPF back into EXTERNAL SIGNAL IN. NOTE: the KYBD CVOUT to HPF CUTOFF patch is not shown for clarity.Â
Now, you can adjust the Signal Level and the Low and High Cut Frequencies to get a bunch of new Snare sounds.